3D Print Your Own Operant Conditioning Chamber
This project was covered by 3Dprint.com
An updated version of this project with complete instructions for assembly can be found on Thingiverse:
Operant Conditioning Chamber for rats
Peristaltic pump for liquid reinforcement

———————————————————————————
Disclaimer
The information presented in this section can be freely downloaded. I made an effort to create accurate drawings. I have tested the files extensively and assembled some chambers but cannot guarantee that you will be able to reproduce the chamber. If your project fails, I would appreciate your letting me know what failed to improve the design but I will no be held responsible. Remember that this is a free project intended for academic purposes only.
The author takes no responsibility for anyone who gets hurt trying to assemble this chamber.
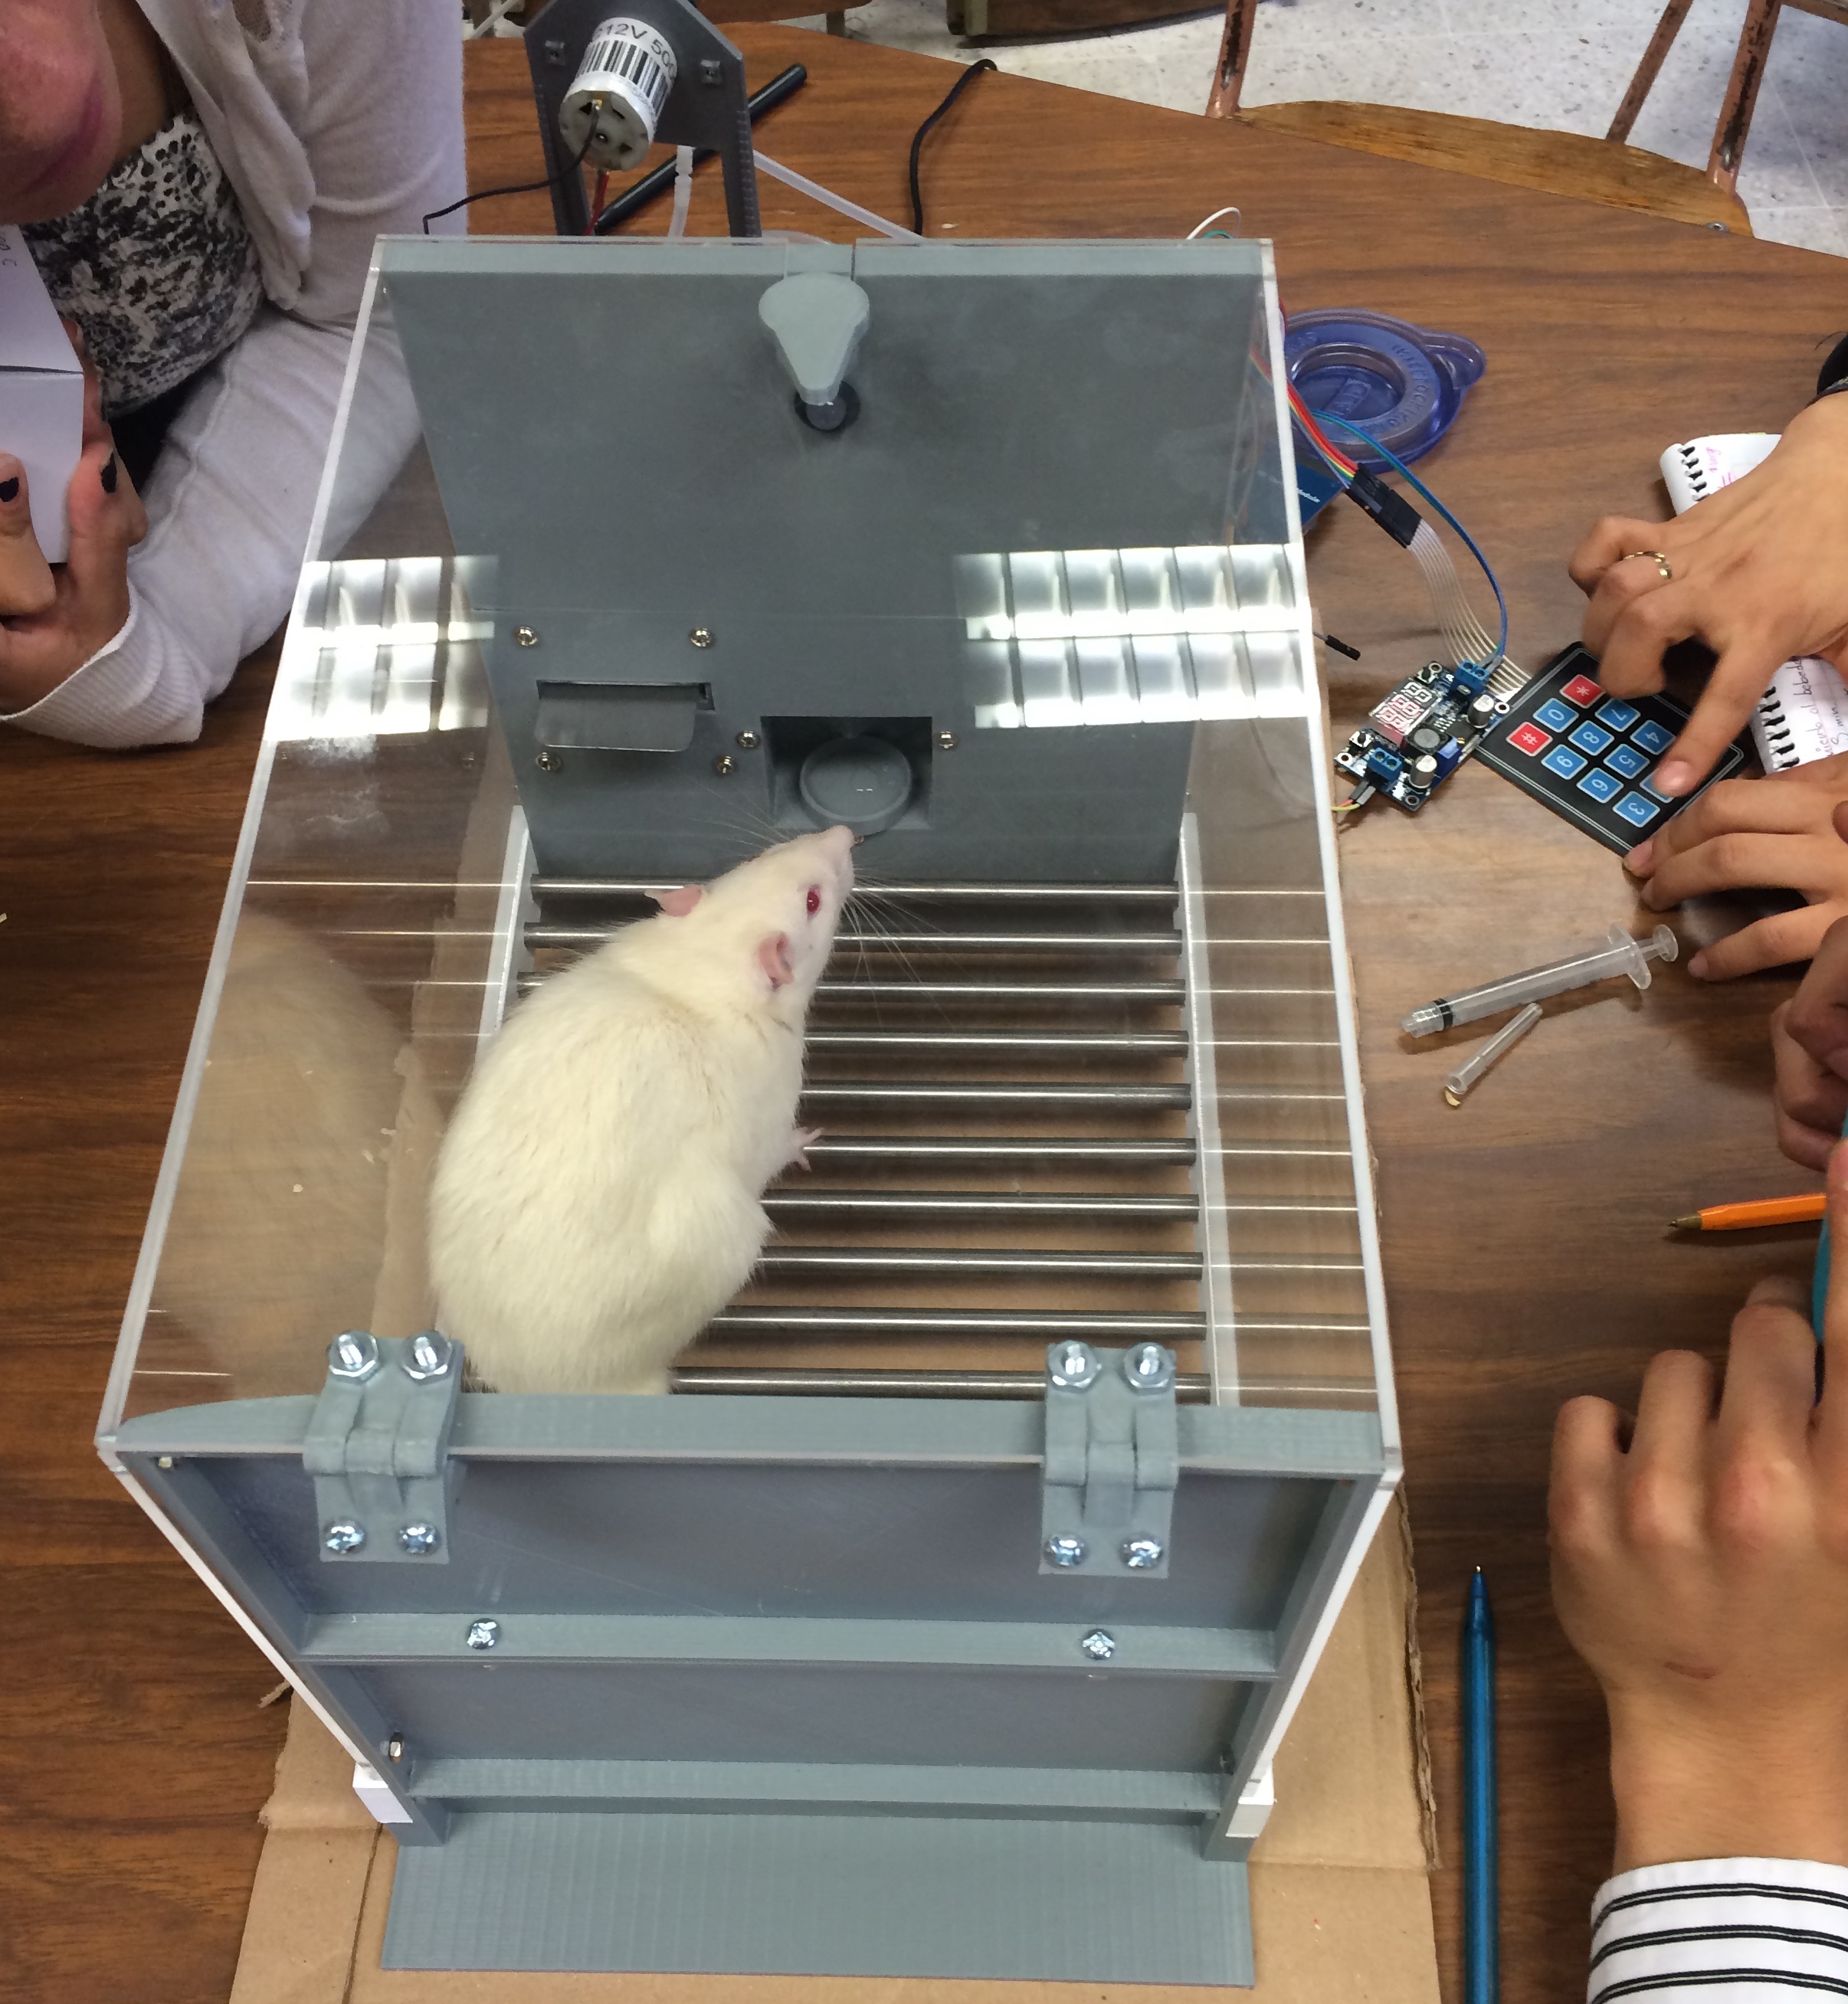
Part 1: Chamber (read the three parts before starting)
Download and extract the files.
3D print all .stl files. I use PLA because it is a non-toxic material. A layer height of 0.3 mm and a 20% fill density are recommended. No support material is necessary. I like printing the grid using white PLA and the rest of the parts using gray PLA, but you could use any color you like.
I also have the files in 123D Design format. Please let me know if you need these files, and I will be glad to send them to you.
A file in AutoCAD format (.dwg) is included with the 3D printed parts. The parts in this file must be laser cut. Three chamber walls are included in the file. Send the .dwg file to any laser cutting service and specify that you need the parts in 3 mm clear acrylic. Red lines in the drawing represent cuts.
You will need also the following materials:
15 – Stainless steel rods (8 mm diameter x 210 mm in length) . These can be obtained from any 3D printer-part supplier. Some suppliers can be found also on Ebay.
1 – 10 mm LED with holder. This LED will be used as houselight. I like Adafruit’s diffused white LEDs (https://www.adafruit.com/products/846) and LED Plastic holder (https://www.adafruit.com/products/2171). These fit perfectly in the chamber.
4 – #6-32 x 3/4 in. Machine Flat Phillips Screws with nuts. These are used to attach the rods base to the chamber walls. (I got these at Home Depot)
16 – #6-32 x 1/2 in. Machine Round Combo Screws with nuts. These are use to secure the panels, and the hinges. (I got these at Home Depot)
7 – M3 x 10 mm Screws. These are used for mounting the lever and the water (I got these at Home Depot)
E6000 glue. For some parts it is necessary to use glue. The cover of the tray, the parts holding the steel rods, the small flange that keeps the door locked, all require glue. The rest of the parts can be glued together only if you want to make the chamber stronger.
Use the following drawing to assemble the box.
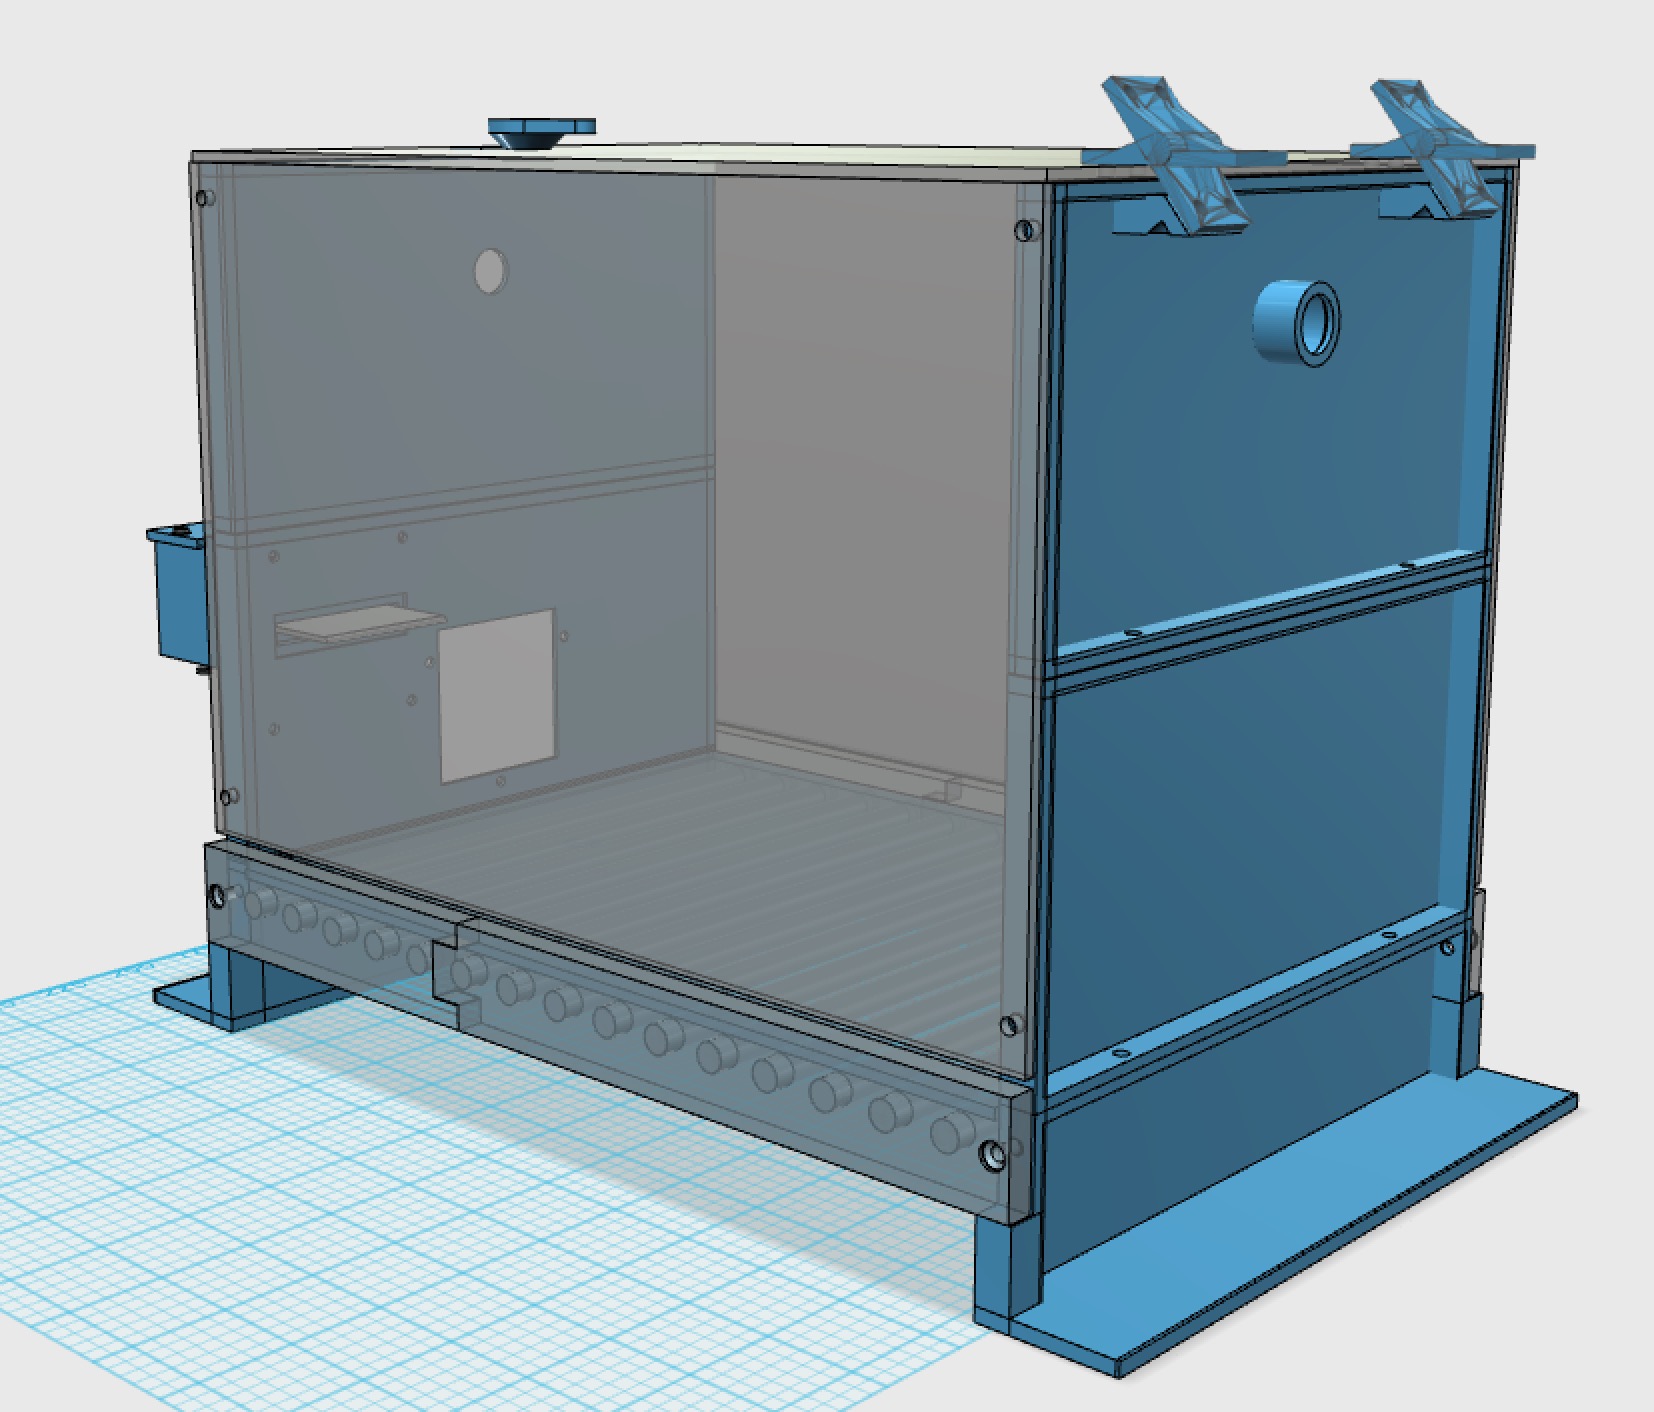
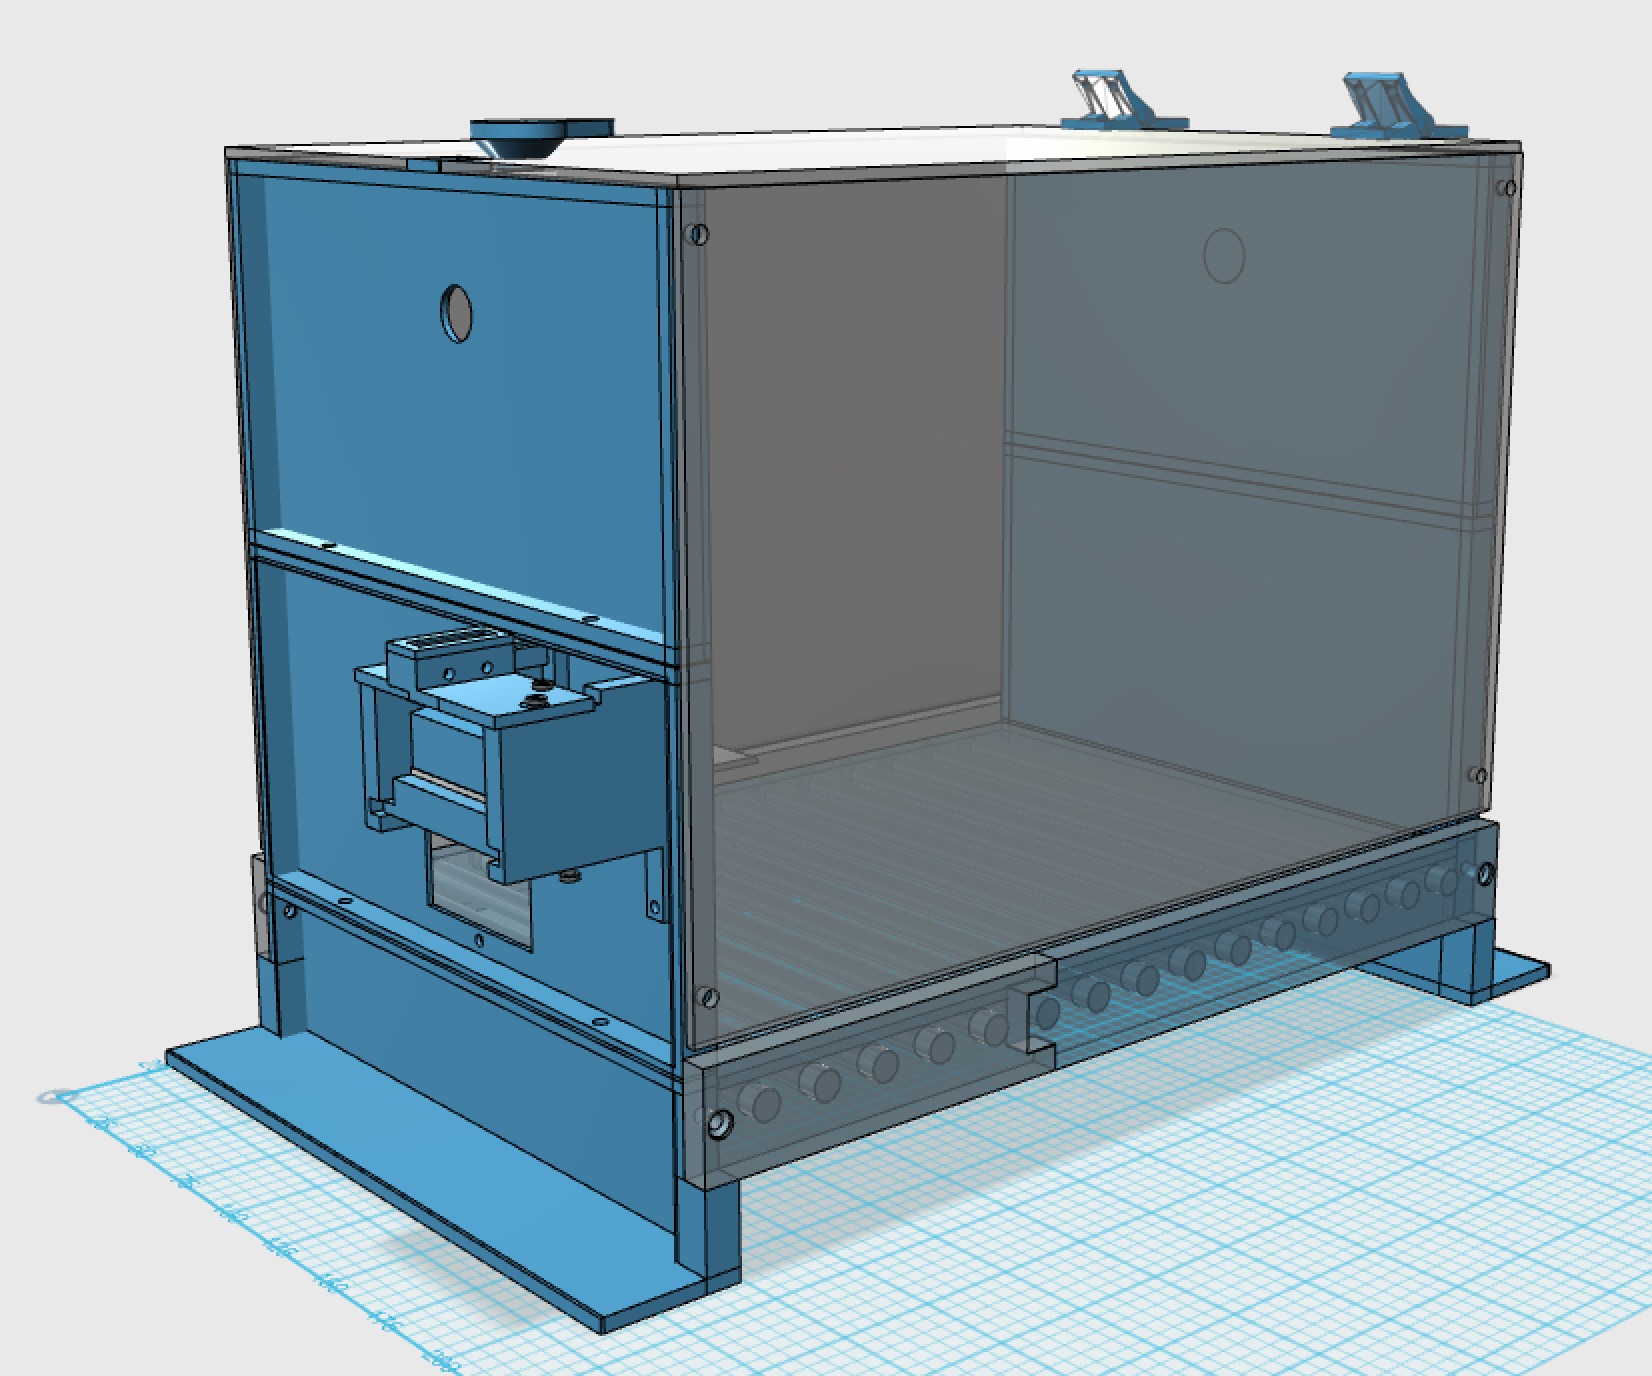
The blue parts are 3D printed. The gray parts are laser cut acrylic.
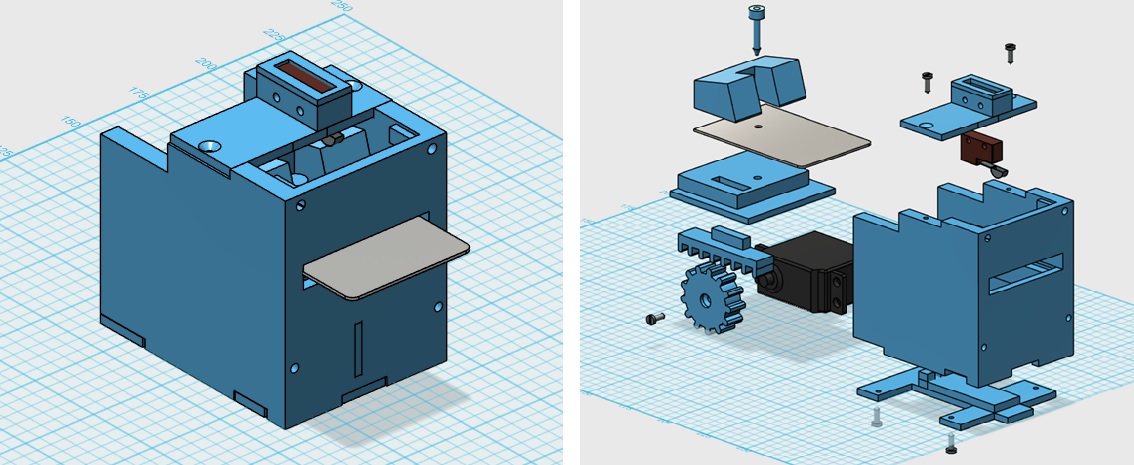
Part 2a: Retractable Lever Mechanism
(if you need a standard non-retractable lever go to Part 2b)
Download and extract the files.
3D print all .stl files. I use PLA because it is a non-toxic material. A layer height of 0.1 mm is recommended. Most parts can be printed with a 20% fill density. However, part “bumper.stl” must be printed with 100% fill density. This part counterbalances the weight of the lever and must be heavy. Only the part “body.stl” requires support material.
You will need also the following materials:
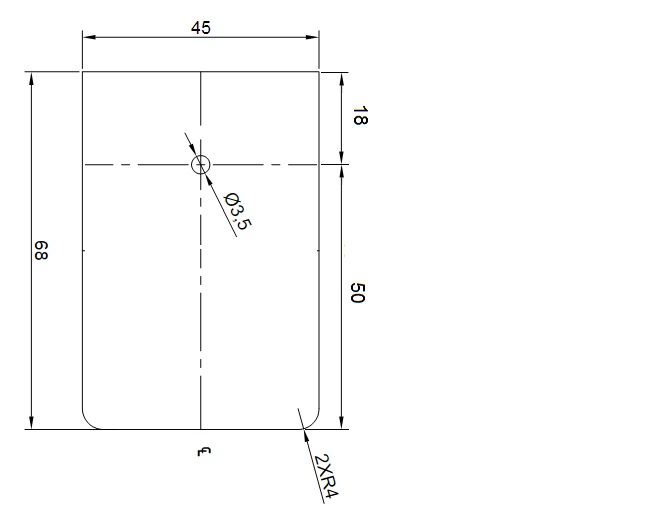
1 Stainless steel metal plate. I like to use a metal lever because rats occasionally chew the lever. If you don’t mind about this problem you could print the file “Lever.stl”. My recommendation, however, is to ask a CNC cutter service to make a stainless steel plate for you. The dimensions can be found in the following file. Note that all the measures are in millimeters.
1 Servo motor (standard size). I use the Tower Pro MG995R because of the high torque (https://www.adafruit.com/products/1142).
1 Snap action switch. The “switch.stl” file was designed specifically to hold a Honeywell 311SM4-T switch. These switches are very precise and the lever was calibrated using these switches. I got them from Mouser Electronics (part # 785-311SM4-T). www.mouser.com.
5 – # 4 x 1/2 in. Metal Flat Phillips Screw (got them from Home Depot).
To assemble the lever use the following drawing:
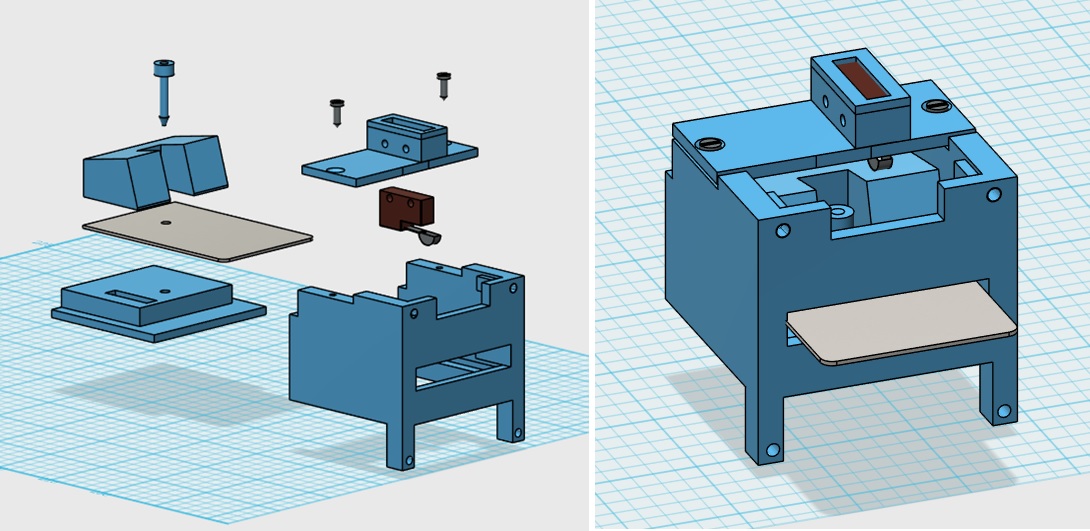
Part 2b: Standard Lever Mechanism
If you need a standard non-retractable lever, download and extract the following files. This lever is cheaper and easier to assemble than the retractable lever described in Part 2a.
3D print all .stl files. I use PLA because it is a non-toxic material. A layer height of 0.1 mm is recommended. Most parts can be printed with a 20% fill density. However, part “bumper.stl” must be printed with 100% fill density. This part counterbalances the weight of the lever and must be heavy. No support material is necessary.
You will need also the following materials:
1 Stainless steel metal plate. I like to use a metal lever because rats occasionally chew the lever. If you don’t mind about this problem you could print the file Lever.stl. My recommendation is to ask a CNC cutter service to make a stainless steel plate for you. The dimensions can be found in the following file. Note that all the measures are in millimeters.
1 Snap action switch. The “switch.stl” file was designed specifically to hold a Honeywell 311SM4-T switch. These switches are very precise and the lever was calibrated using these switches. I got them from Mouser Electronics (part # 785-311SM4-T). www.mouser.com.
2 – # 4 x 1/2 in. Metal Flat Phillips Screw (got them from Home Depot).
E6000 glue. This is necessary to glue the support (support.stl) of the lever to the case (body.stl).
To assemble the lever use the following drawing:
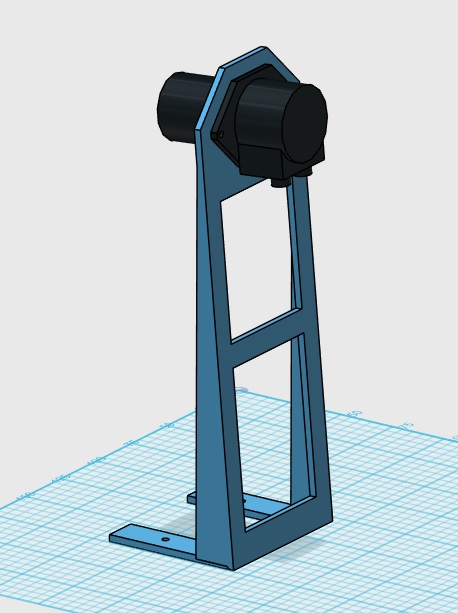
Part 3: Water Delivery System
Water reinforcement is deliverd using a peristaltic water pump. I bought mines from Adafruit (https://www.adafruit.com/product/1150). This peristaltic pump can be used to deliver accurately 0.1 ml with every operation.
The water pump can be screwed using 2 # 4 x 1/2 in. metal flat phillips screw to a 3D printed stand.
Download the .stl file and print it using 0.3 mm layer height.
It is recommended to attach a medical needle to the end of the silicon tubing that will deliver the drop of water. Adding the needle increases precision. The needle from a standard 3 ml syringe can be used. The needle fits on top of the chamber’s water tray and cannot be reached by the rat.